
Finnie Installation Guide
The Finnie wallet makes it easy to create and manage digital assets on the Koii Network, from NFTs to KOII and Arweave tokens, all from the convenience of your web browser. Installation only takes a few minutes. Let us show you how in this step-by-step guide.
Things you will need before we get started:
- A Recommended Browser (recommend Chrome or Brave)
- An active Twitter account
- A safe place to write down your password and recovery phrase
Once you have those three things, we can begin the installation process. If you encounter any issues during the process, please feel free to reach out to our support team here.
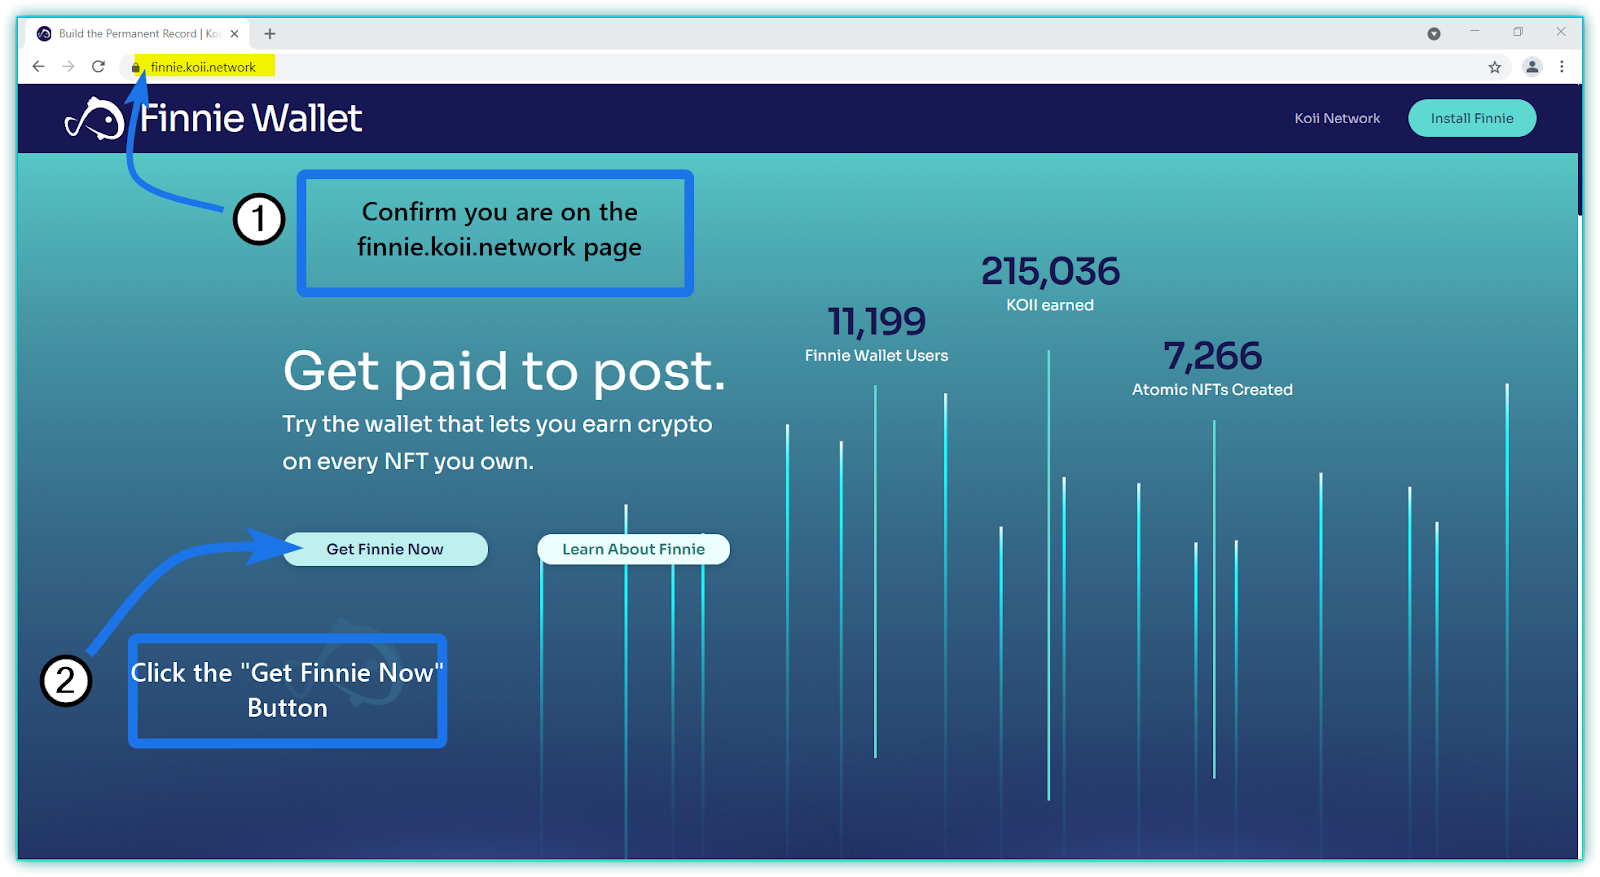
Let’s start by opening the link https://finnie.koii.network in a new browser window. Once the page has loaded, click the “Get Finnie Now” button.
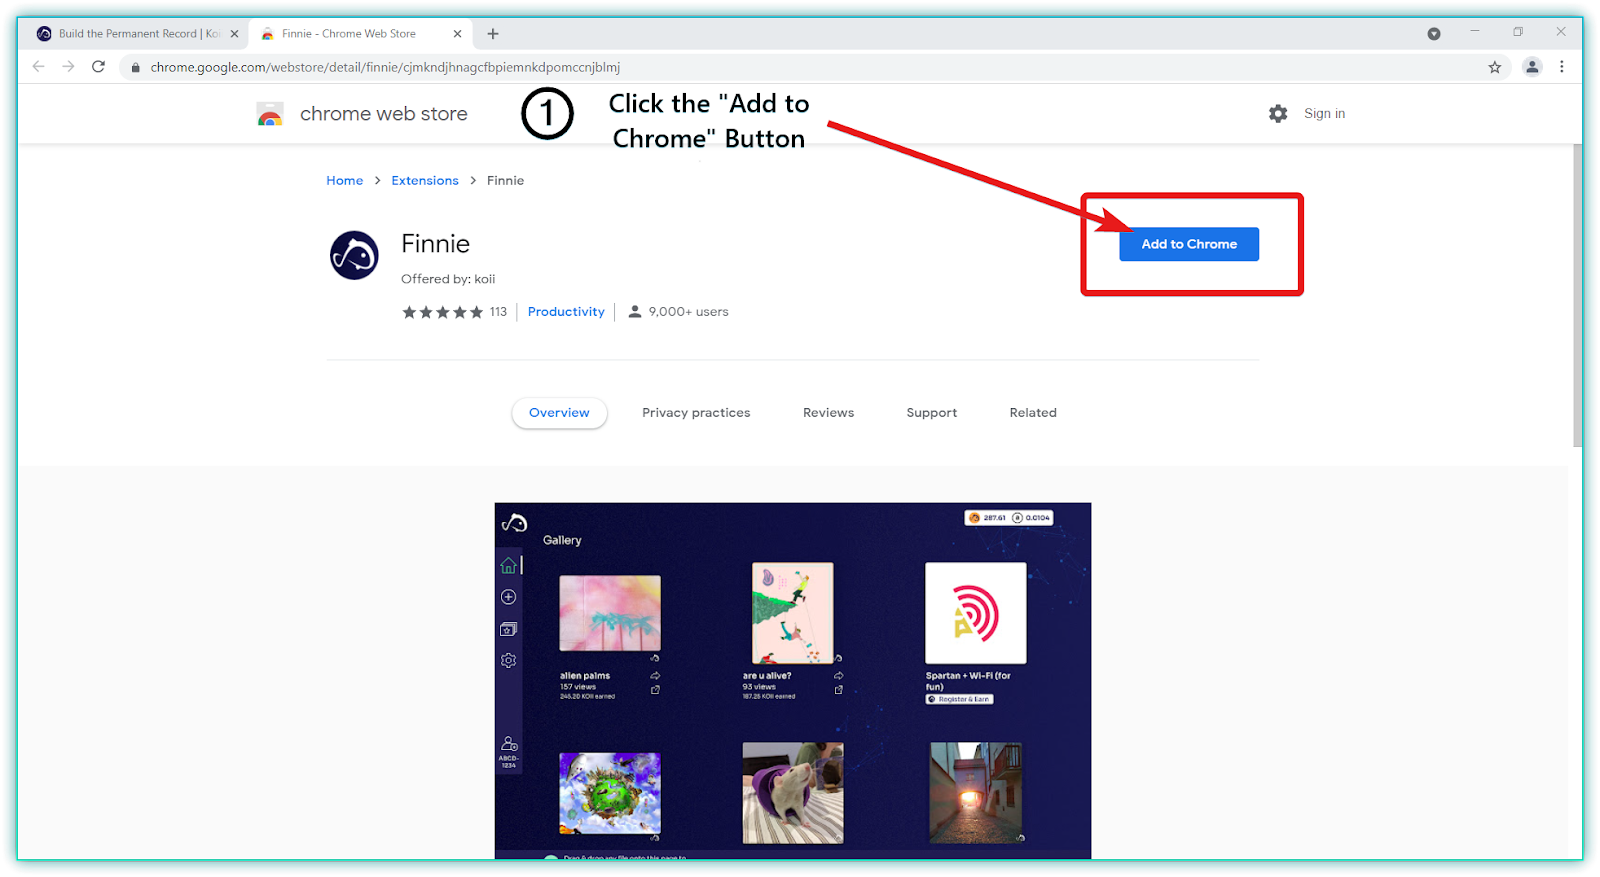
Next, you will be directed to the Chrome Web store. Click the “Add to Chrome” button.
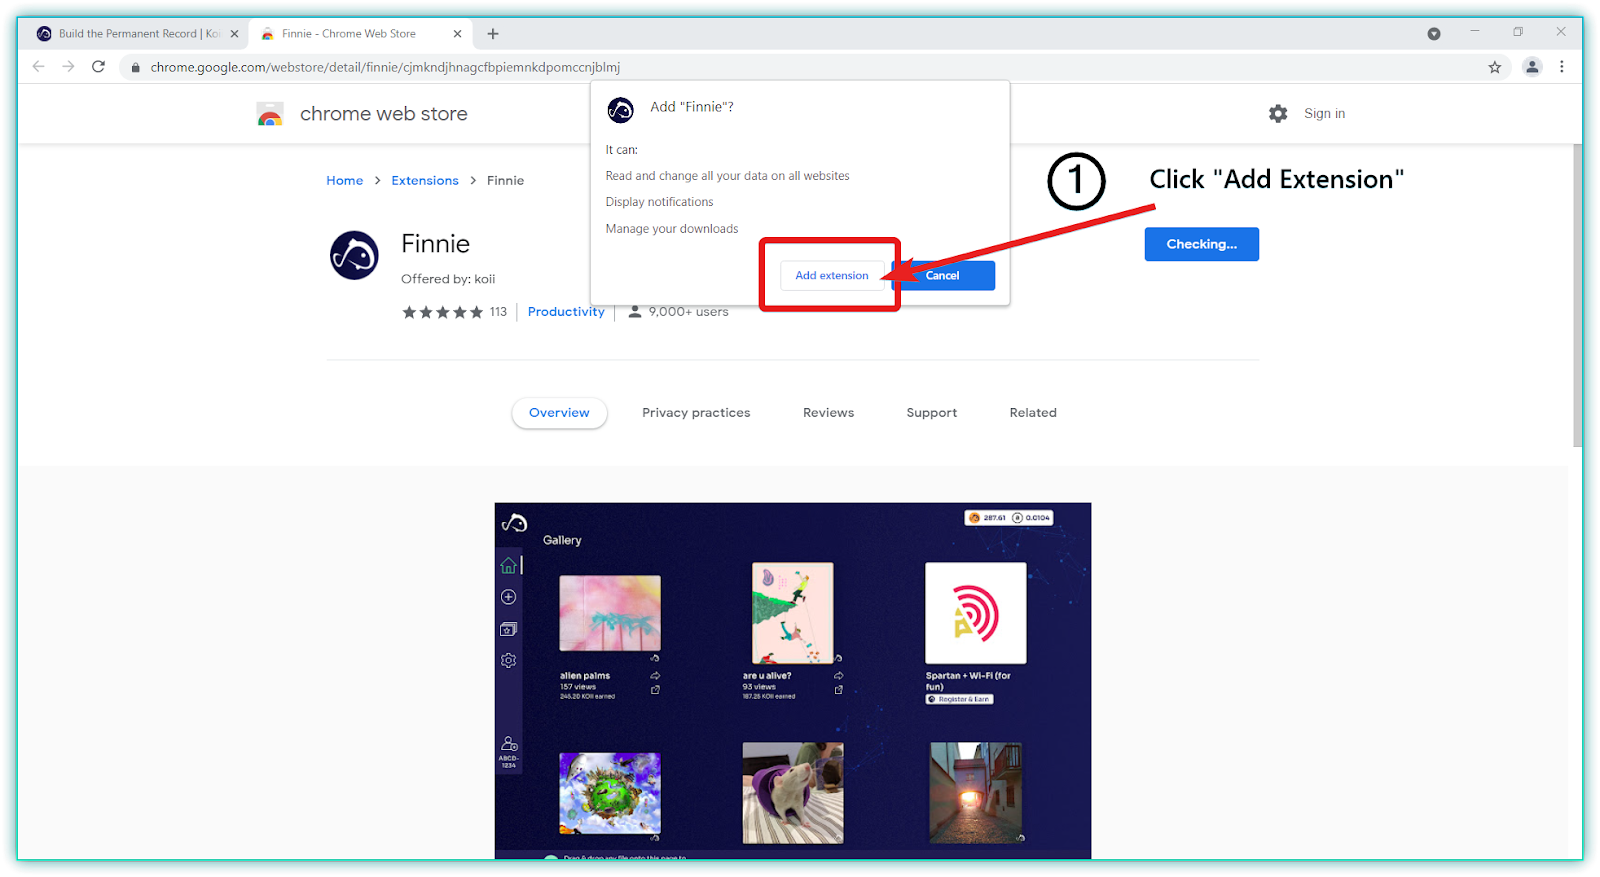
Once the extension has been downloaded, you will see a box appear asking if you would like to Add “Finnie.” Click the “Add extension” button.
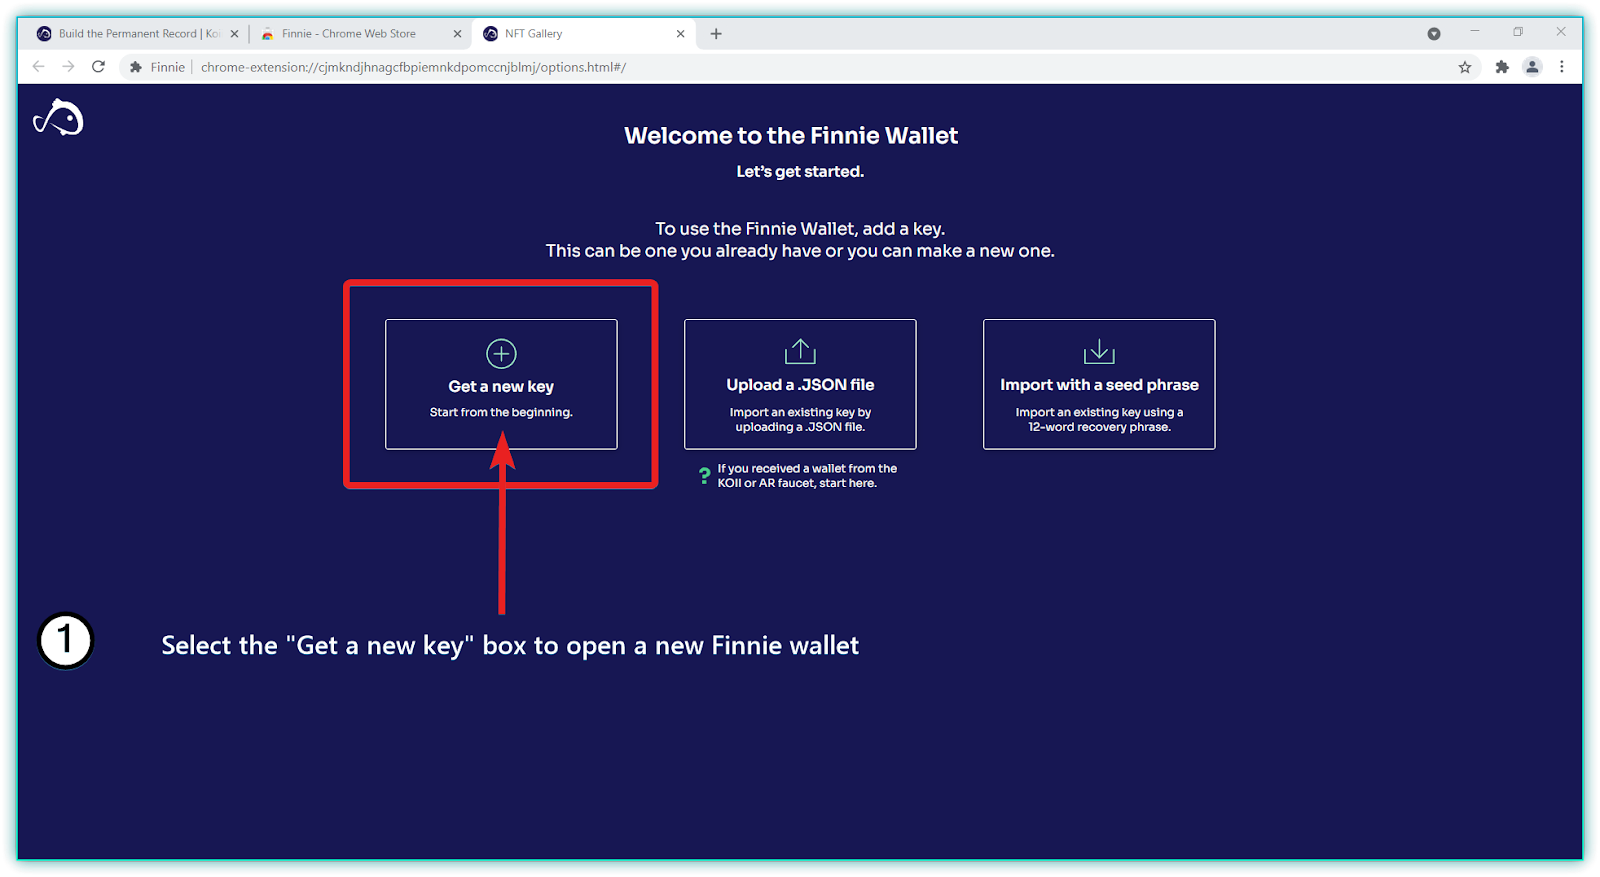
After clicking “Add Extension” you will be taken to the Finnie Wallet welcome page. As a new user, you will want to select “Get a new key.”
Next, you will be brought to the “Get a new key” page. Here you should select the “Koii Key (Arweave)” box.

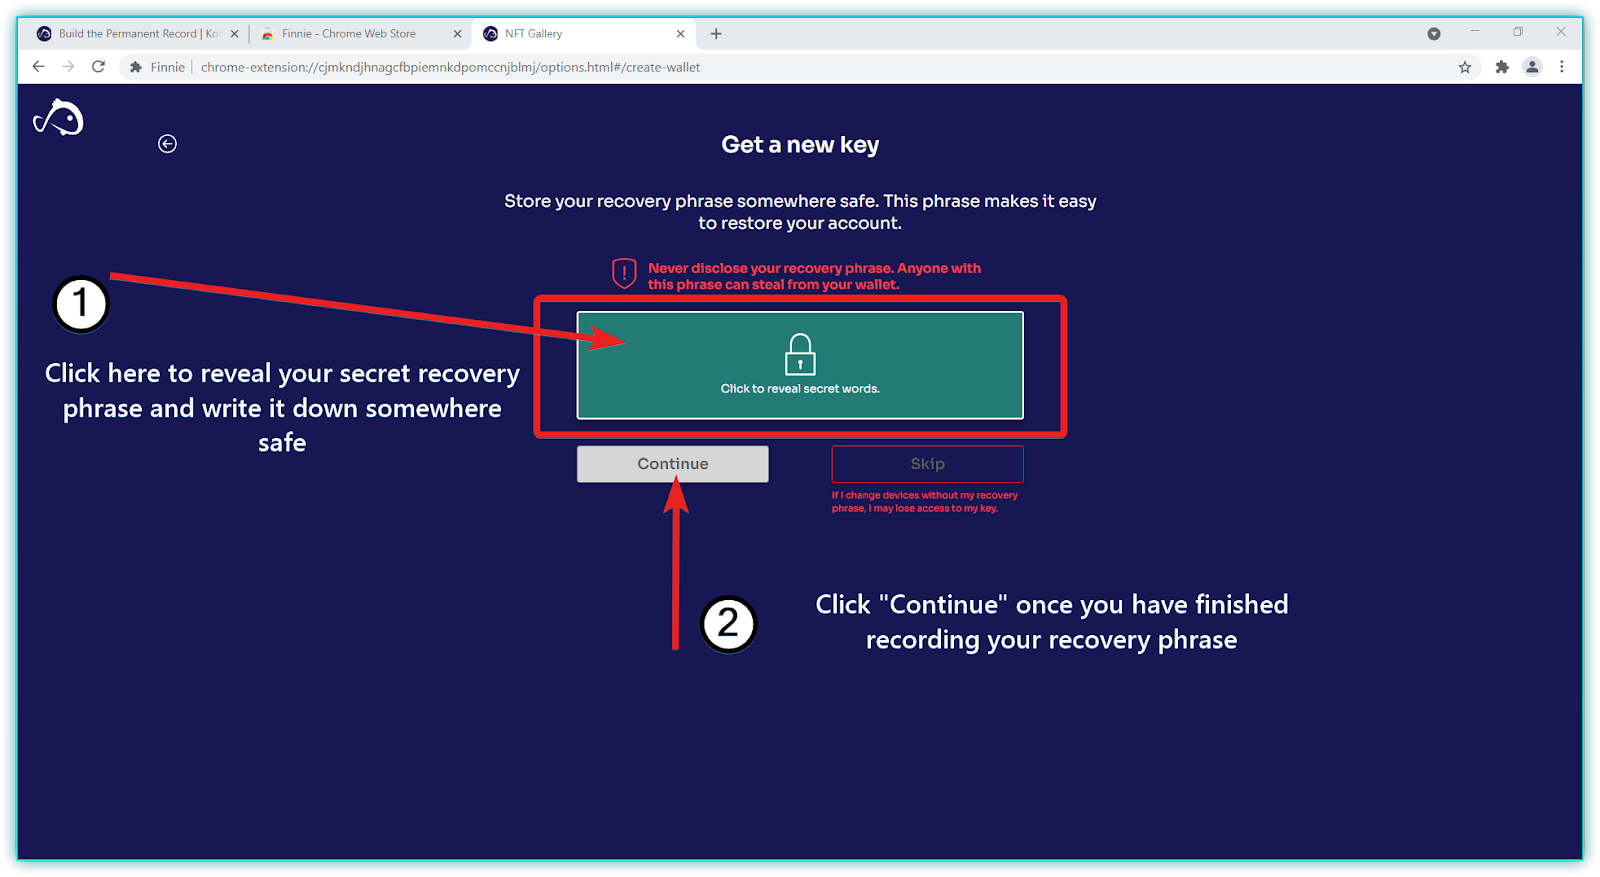
On the next page, you will have the option to reveal your recovery phrase. It’s important to store this phrase in a safe place as it makes it possible to restore your account. Click the green box to reveal the recovery phrase and copy the words in the same order they appear in the box. When you have safely recorded the phrase, click “Continue.”
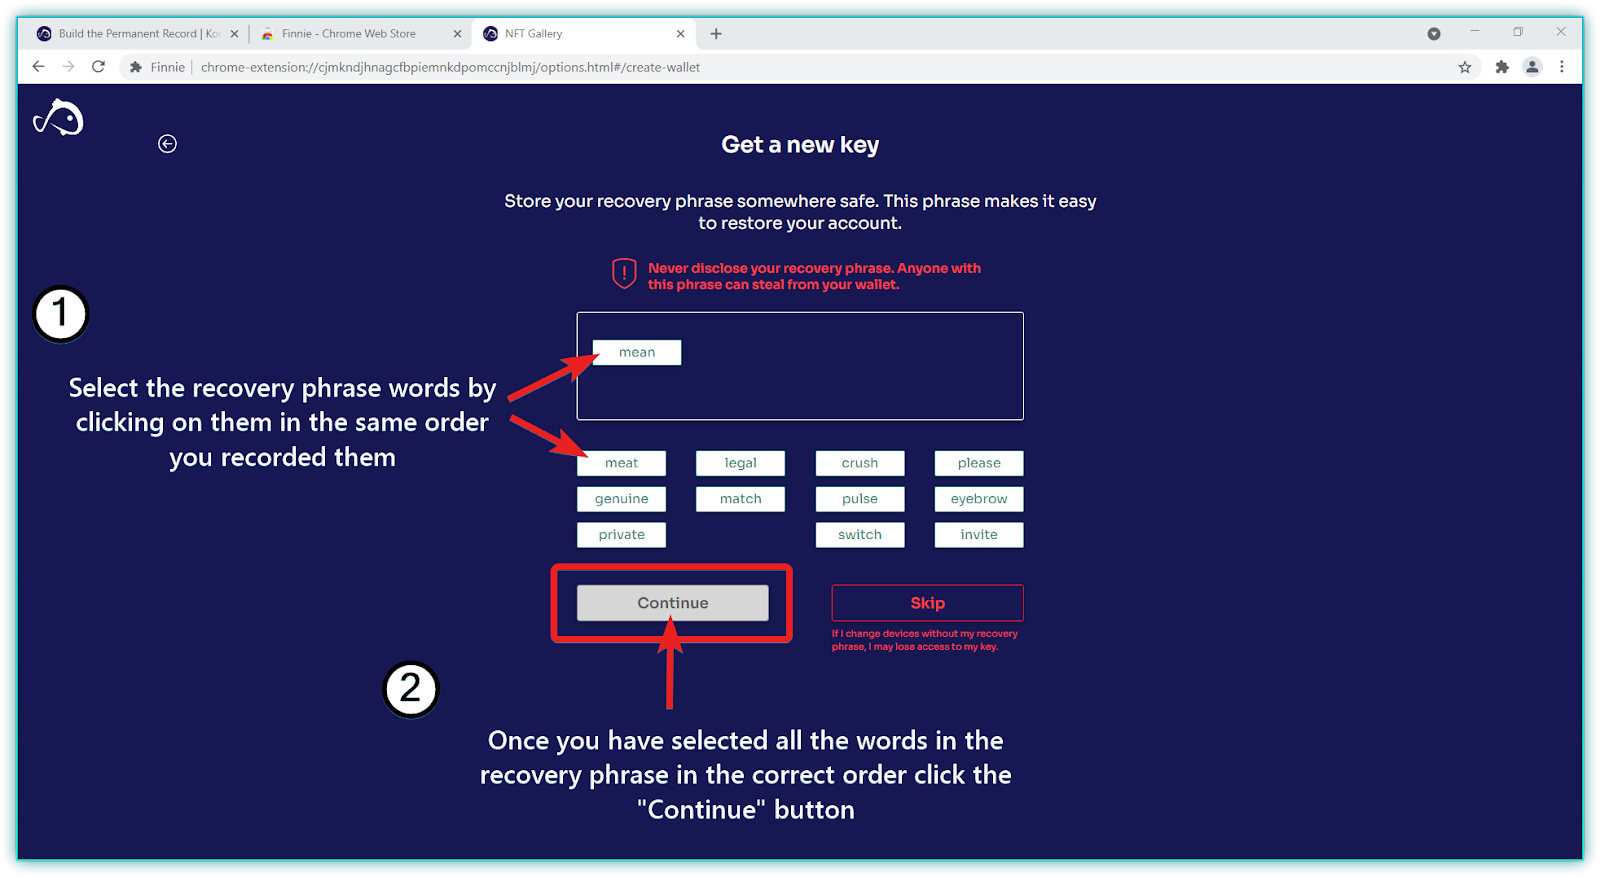
To confirm that you have recorded your recovery phrase in the correct order and have not made any mistakes (you should also check the spelling of each word) you will be asked to select each word in the order it originally appeared. Once you have selected the words correctly, you can click “Continue” to move on to the next step.
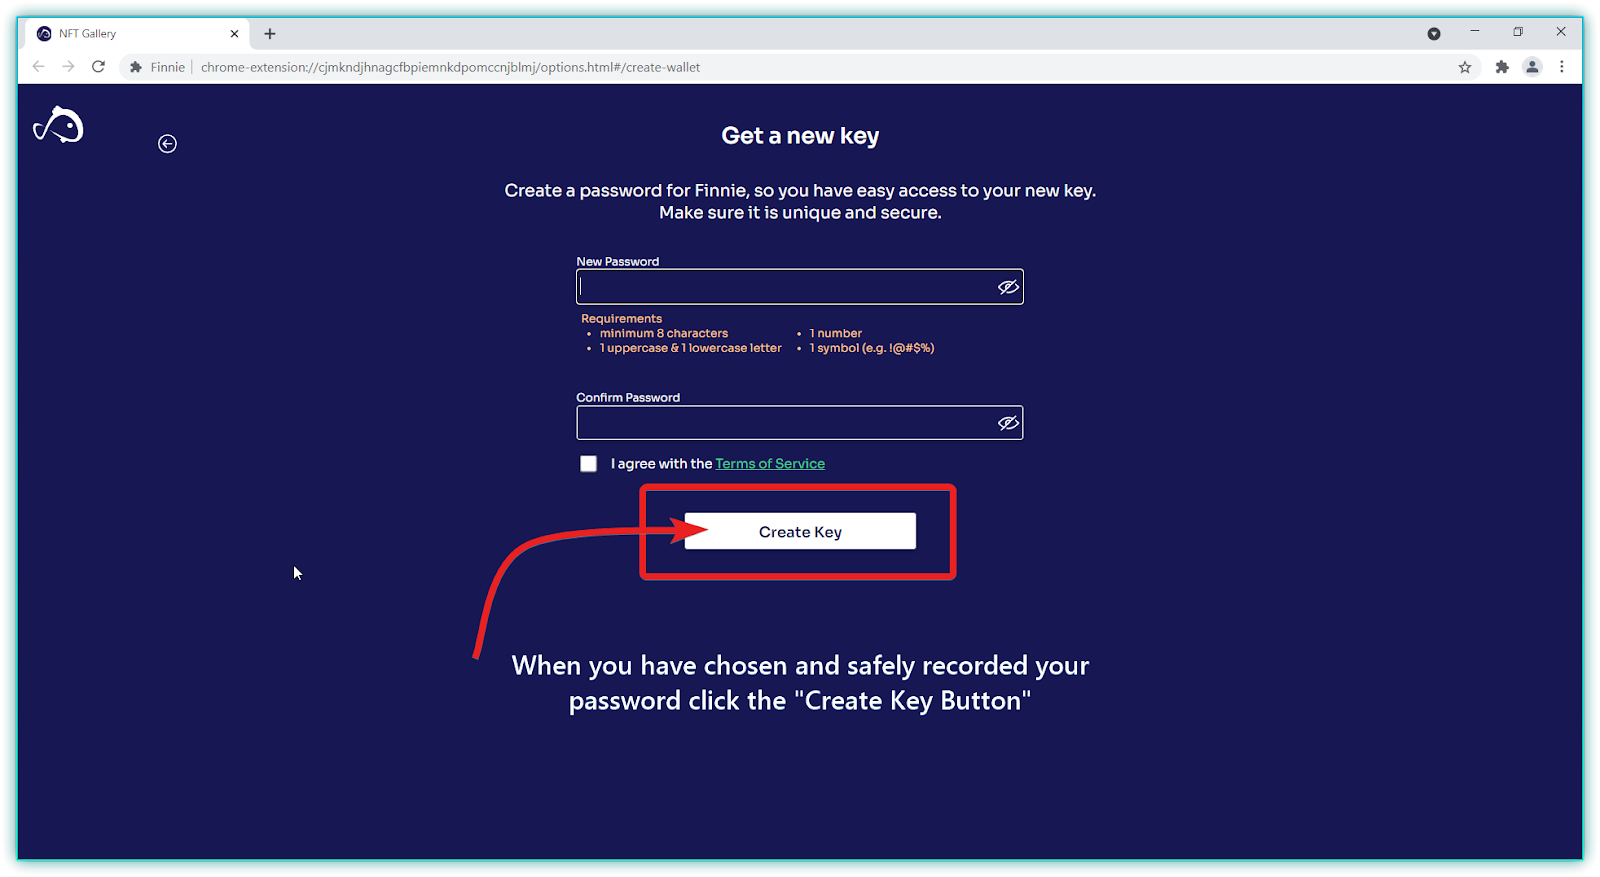
You will now be asked to create a password for your Finnie wallet (please note that the recovery phrase and password are used differently, your recovery phrase is used to restore your wallet if you forget or lose your password). Choose a new password based on the listed requirements and record it safely. When you’re ready, agree to the terms of service and click “Create Key.”
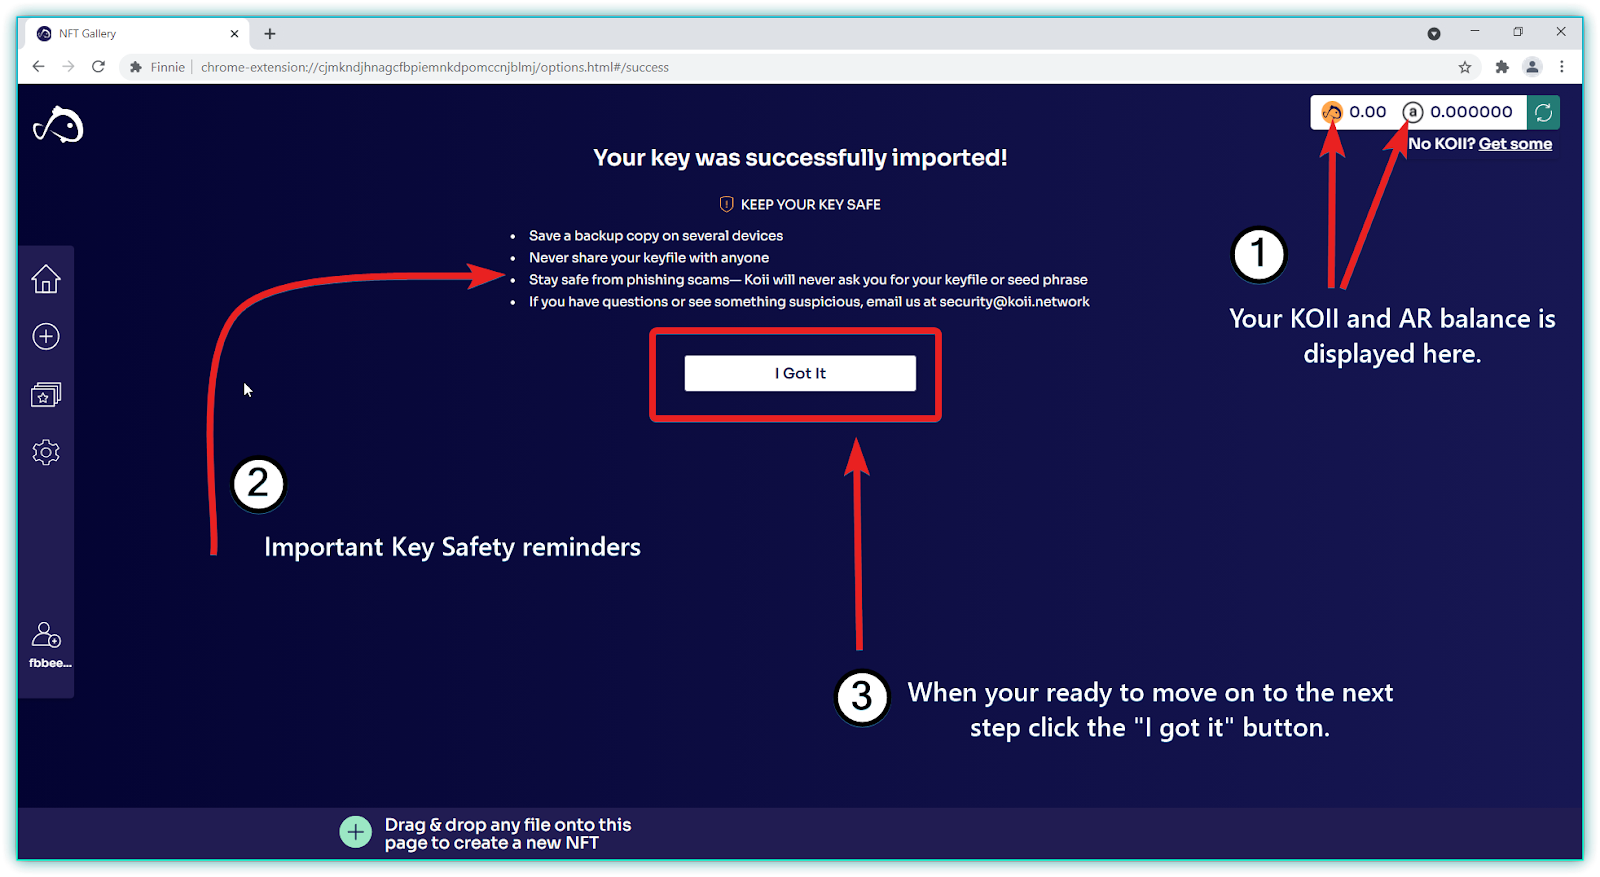
Your Koii wallet has successfully been created. You will notice in the top right-hand corner that you can now see the balance of Koii and AR tokens in your wallet. Read through the reminders to keep your key safe and click “I Got it” to move on to the next step.
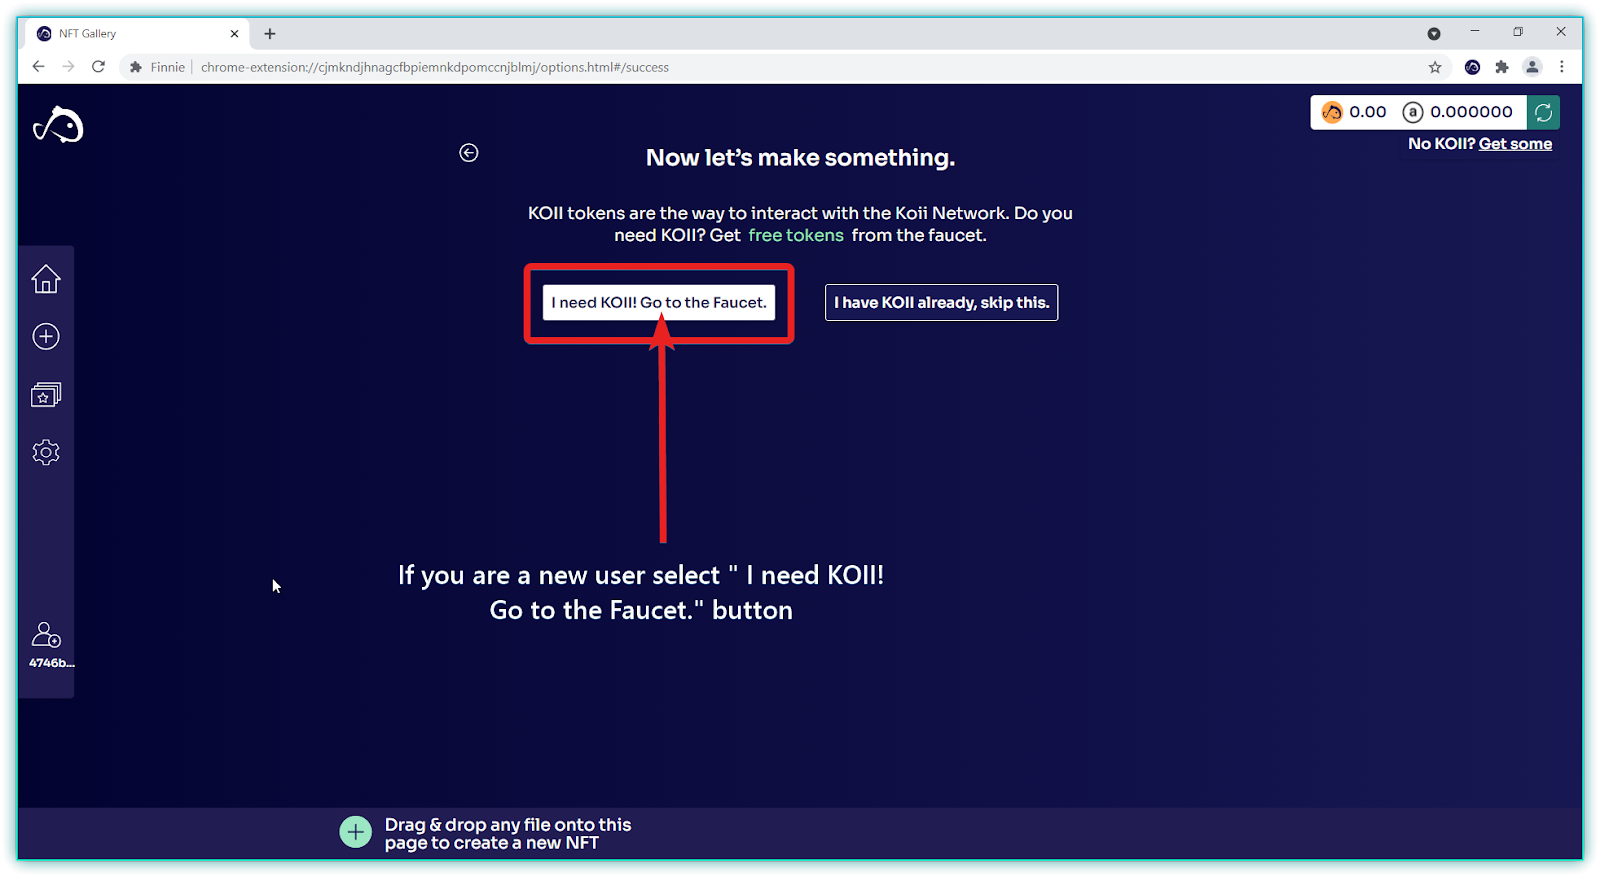
In order to start using your Finnie Wallet to create content, you will need a small amount of KOII and AR (Arweave) tokens. To get started with some free KOII select the box that says “I need KOII! Go to the Faucet.”
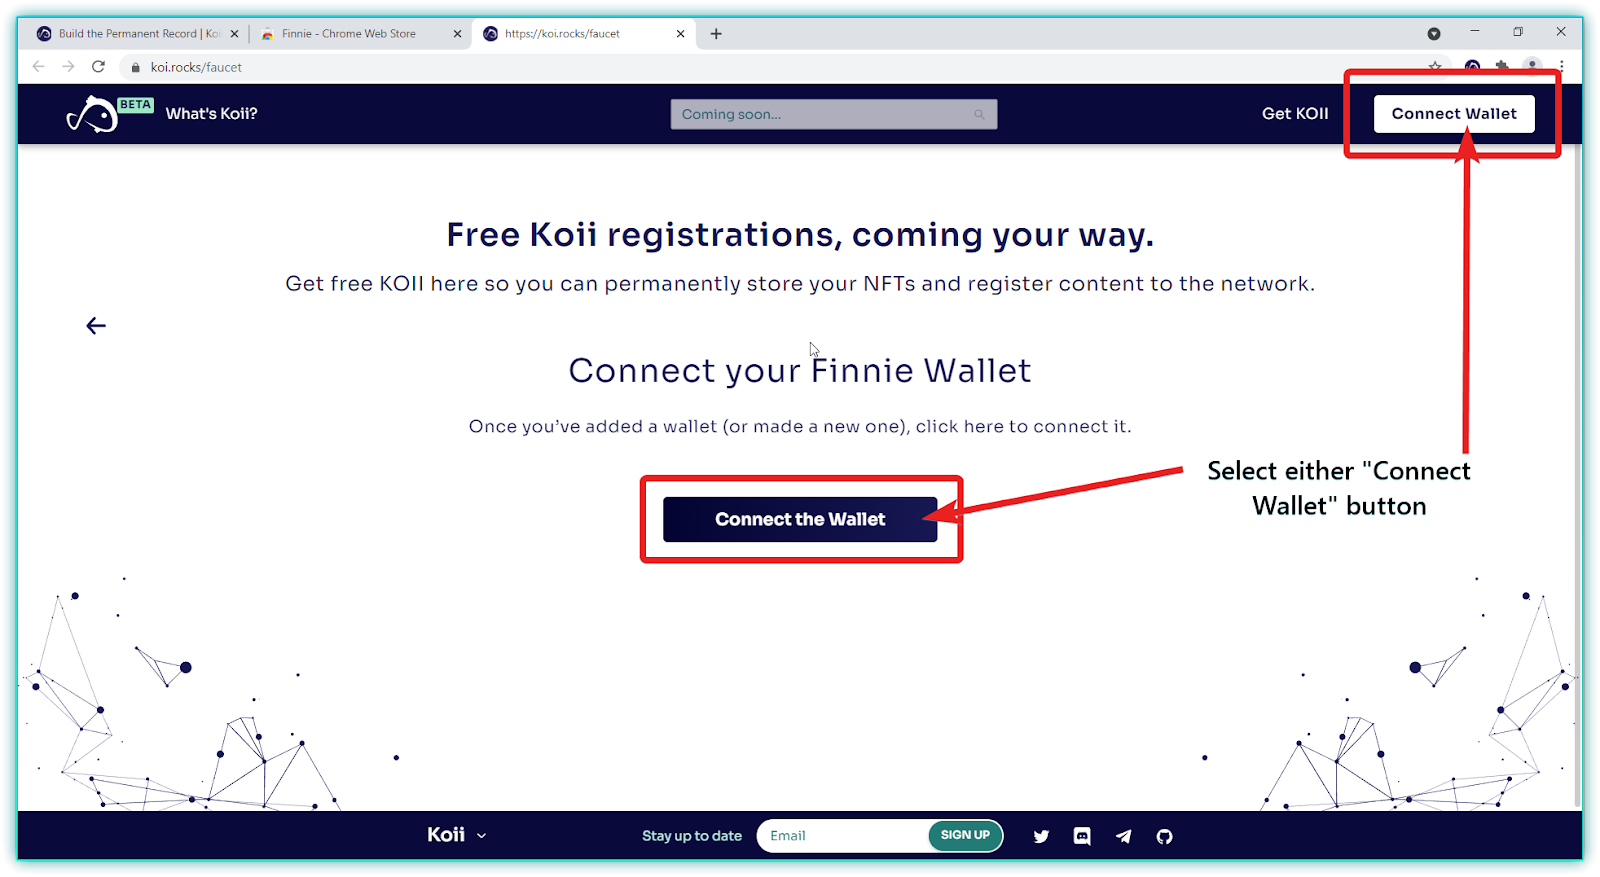
In order to send you some KOII and AR tokens, we need to connect your Finnie wallet to our website. Click either of the “Connect Wallet” buttons to move on to the next step.
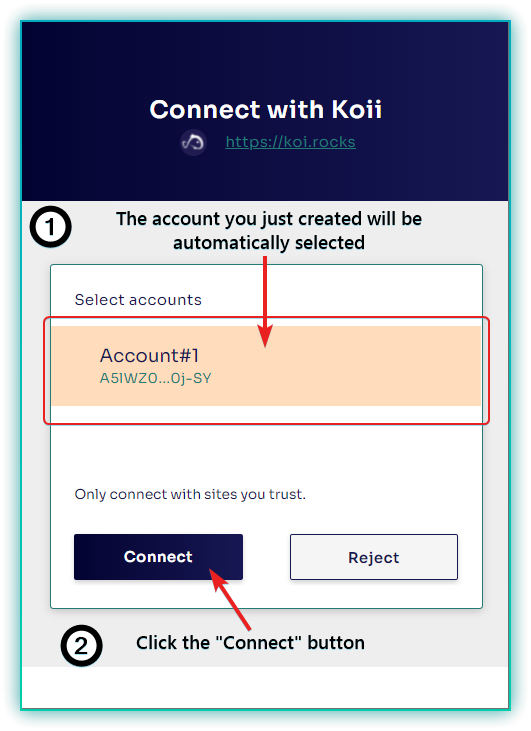
Next, you will see a small “Connect with Koii” window pop up. Select “Account #1” and click “Connect.”
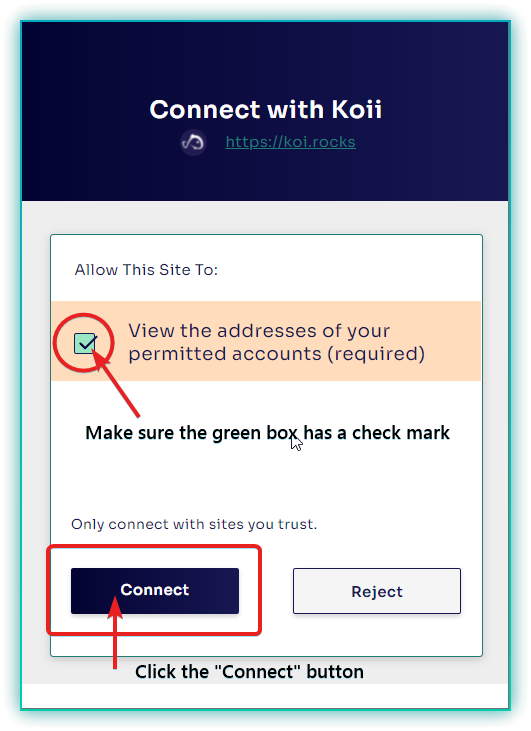
After selecting your account you will want to make sure you have a check in the green box next to “View the addresses of your permitted accounts (required).” This will allow the Koii Network to connect to your wallet address. Once the green box is checked you can click “Connect” to move on to the next step.
Your wallet is now connected and you should see a green box appear in the top right corner of your screen that reads “Koii Extension Wallet connected.” You are now ready to receive tokens into your wallet. Before we send you the tokens we need you to send out a tweet to verify you are not a bot. Once your wallet is connected click “Tweet to Verify.”
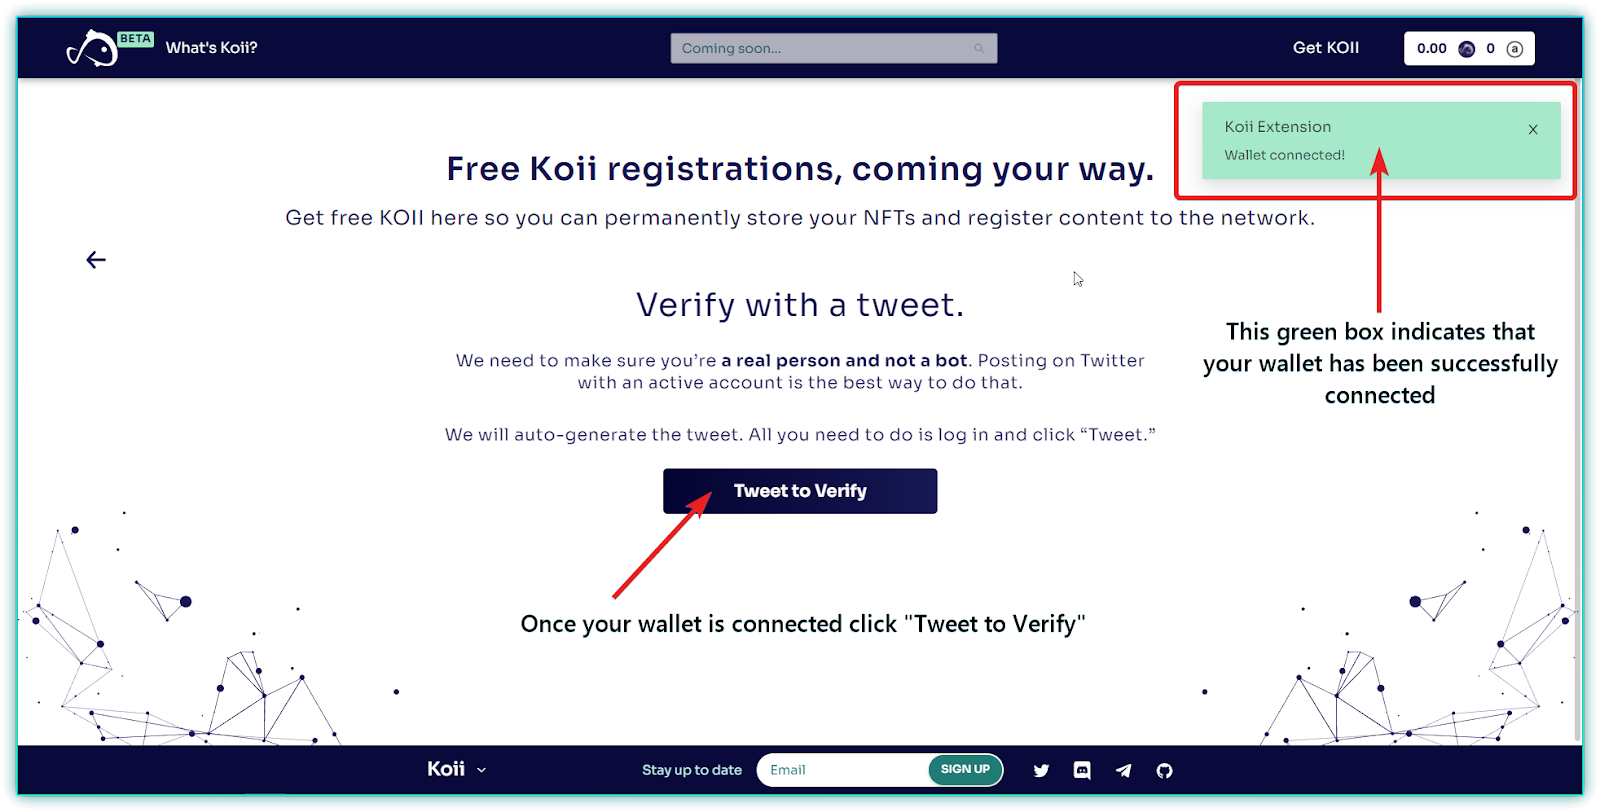
Next, a pop-up window will appear with a prepared tweet. Make sure you don’t change any of the text in the tweet and click the blue “Tweet” button.
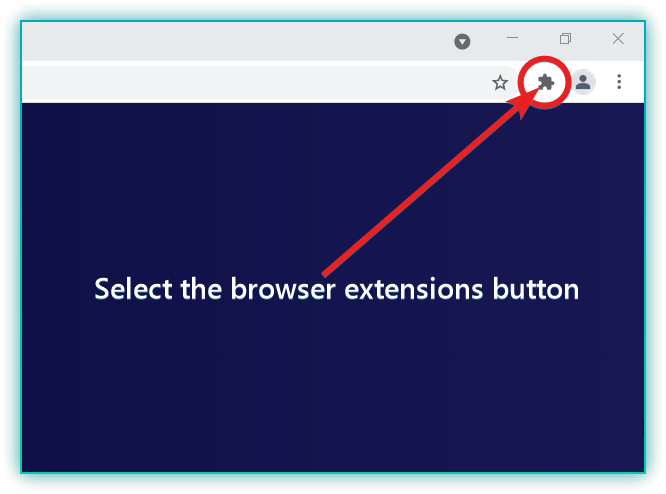
Congratulations! Soon you will be using all the features Finnie has to offer, all you need to do is wait for your KOII and AR tokens to appear in your wallet. While you wait, make sure you pin the Finnie browser extension for easy access. Click on the extensions button in the top right corner of your browser window.
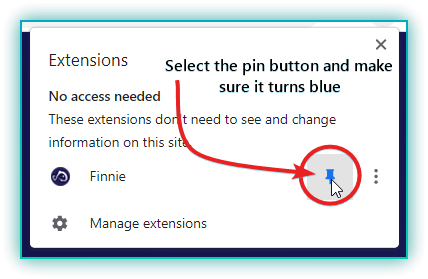
Next, select the pin icon next to Finnie and the icon will turn blue.
That’s it! You have successfully installed the Finnie Wallet. If you have any questions or concerns during this process feel free to reach out to our support team here and we will get back to you as soon as possible.
If you’re ready to take the next step and mint an NFT using Koii, you can do that right from within the Finnie Wallet. Let us show you how in our guide to minting your first NFT using the Finnie Wallet.
Continue the conversation and join Koii’s official community Telegram channel, Koii’s Discord, and follow us on Twitter.
 #Koiicares Contest Recap