Hi folks, today is a great day to make NFTs! The Finnie Wallet is the newest tool from the Koii Network, where you can create NFTs in under 1 minute, for less than $0.01. (Setup takes about 2 minutes.)
There are a few really cool features with the Finnie Wallet that make NFTs and digital art more accessible to wider audiences (see this blog post about Atomic NFTs to learn more):
- Minting Atomic NFTs is extremely affordable
- Finnie uses Arweave to store your content forever
- Content posted earns KOII tokens for every view
- Cross-publish your NFTs to traditional sites like facebook, youtube, or instagram (Coming soon)
- Create custom galleries and sell your NFTs direct to collectors with 0% commission (Coming soon)
- Multiple blockchain networks in one (Coming soon)
These are just a few of our favorite features, more tutorials will be published soon with all the cool things Finnie can help you do!
We’ll cover 4 things in this tutorial. Feel free to skip ahead if you’ve already completed any of the steps.
Note: Our friends at Brokenomics made a great video of this tutorial here.
If you want to read through for yourself, here’s the full steps:
Part 1: Get Finnie
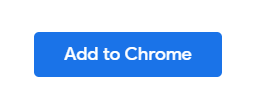
First, head to the Google Web Chrome store to install the Finnie extension. (You can also find it by searching “Finnie” or “Koii” in the Chrome Store. It is the only result, as of this writing, or click here)
Click “Add to Chrome” on the right side.
After a few moments, the Finnie logo will appear in your browser bar in the top right corner of your screen.

Click on the puzzle piece to show your Chrome extension settings, then click the pin icon next to Finnie. This ensures you’ll always be able to see Finnie when you need to.

Part 2: Add a Wallet
Now that we have the extension all ready to go, let’s add a wallet to safely hold all our NFTs!
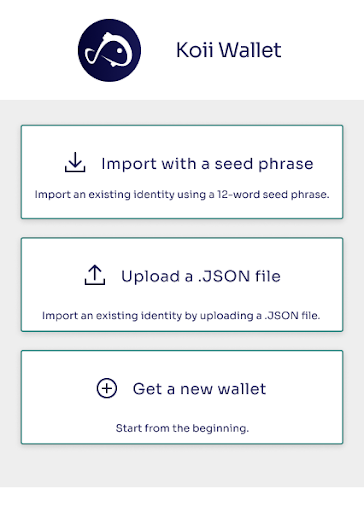
Click on the Finnie icon in your extensions. You will see a dropdown with three different ways to add a wallet.
- Import with a seed phrase: if you have an existing AR wallet that you created using a seed phrase, click this one
- Upload a .JSON wallet file: if you have an existing wallet that only has a .JSON file, this option is for you
- Create a new wallet: if you don’t have an AR wallet yet, this is the place to start!
Soon, you will be able to import non-Arweave wallets & keys. Sign up for the Koii newsletter and follow us on Twitter so you can find out as soon as we release new features like cross-chain compatibility.
Import with a seed phrase
Click on the first option, “Import with a seed phrase,” then paste your existing seed phrase into the top box. Next create a new, secure password. Make sure you keep this password somewhere safe, and don’t share it. Confirm your password, then check the “Terms of Service” box (after you read and agree to the Terms, of course).
Click “Import Wallet.” Now you’re all set with your imported wallet! Click “Finish” when you’re ready.
Upload a .JSON wallet file
Click on the second option, “Upload a .JSON wallet file.” You have two options here: drag and drop your wallet file from your file explorer or desktop, or click the box to open the file selector.
Once you’ve added your .JSON wallet file, create a new, secure password. Make sure you keep this password somewhere safe, and don’t share it. Confirm your password, then check the “Terms of Service” box (after you read and agree to the Terms, of course).
Click “Import Wallet.”
Now you’re all set with your imported wallet! Click “Finish” when you’re ready.
Create a new wallet
Click on the third option, “Get a new wallet.” Create a new, secure password. Make sure you keep this password somewhere safe, and don’t share it.
Confirm your password, then check the “Terms of Service” box (after you read and agree to the Terms, of course).
It may take a few moments to generate the new wallet, but there is a very cute (in my opinion) loading fish while you wait.
Now you’ll see a “Secret Backup Phrase” window. This is where you will find your 12-word backup phrase. The phrase makes it easy to back up and restore your account, but anyone with access to this phrase can steal from your wallet. It is vital that you keep it safe.

Click in the darkened box to reveal your secret words, then copy and store them somewhere safe like a secure password manager or on a physical piece of paper that won’t get lost. Once you have your phrase safely copied somewhere, click “Continue” and select the words in the correct order. After selecting the words, click “Confirm.” Congratulations, you have a new wallet that’s ready to create NFTs!
Part 3: Get some KOII
Already have KOII and AR? Skip ahead to Create an NFT.
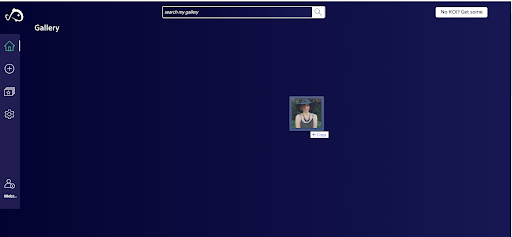
Now that you have a Koii-compatible wallet, you’ll need some KOII tokens (and a tiny bit of AR to pay for storage costs). Click on the Finnie extension icon. When you see the dropdown, click the button near the top that says “My Gallery.”

Your (likely empty) gallery will open in a new window. Read the Beta version notes and then click out of the box. If you don’t have KOII, there will be a button in the top right corner of the page that says, “No KOII? Get some.”
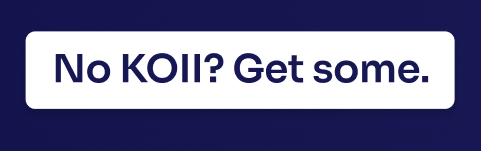
This button will take you to the KOII faucet. You’ll skip step #1 (click “Skip ahead”) because you already have the Finnie Wallet.
Then click “Connect Wallet” in the top right corner of the page to visit the faucet.
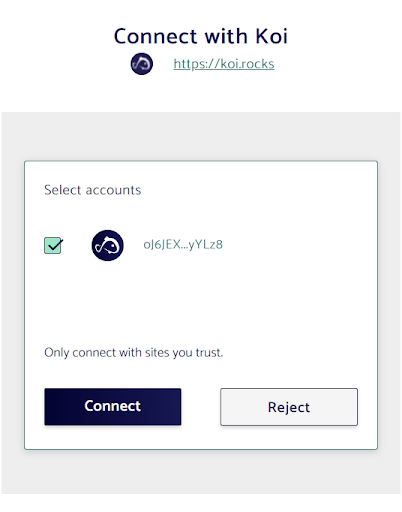
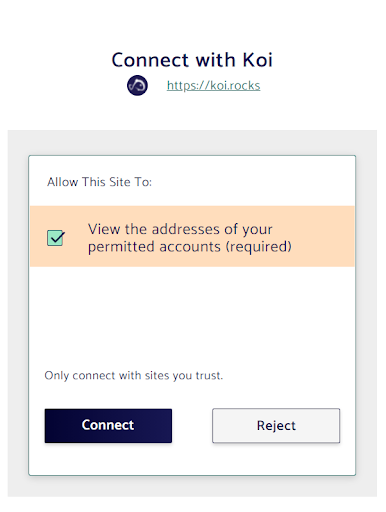
You will get a pop up from Finnie asking you to verify the connection to koi.rocks (this is a security feature so apps can’t connect to your wallet without your consent).
Click “Connect” on the first screen (left), then again on the second screen (right). This is an extra confirmation layer so that you know what each app has access to within your wallet. For example, koi.rocks can only see the public addresses of your key.
Once Finnie is connected, click “Tweet to Verify.” This button will prompt a popup from Twitter, confirming your wallet address and that you are a real person. Don’t alter the tweet, as it may cause verification issues.
After you tweet, click “Get KOII.” It may take a few moments for the tokens to appear in your wallet, but don’t worry— KOII and a small amount of AR (for storage fees) are on their way.
Part 4: Create an NFT
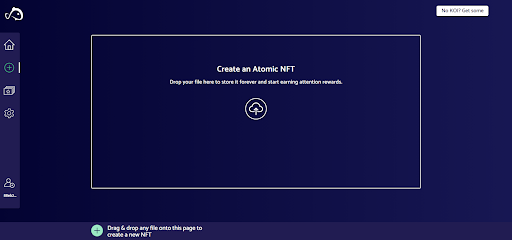
After you visit the faucet, it’s time to create your first Atomic NFT! This part is super quick and simple.
There are two very easy ways to start. First, you can drag and drop any media file directly onto the browser page. (Please note that at this time, Finnie can only accept file sizes up to 15MB.)
The second way is by clicking on the plus (+) button in the left-side menu. From here, you can drag and drop or click to open your file explorer.
After you upload your media file, add the title of the piece, your desired username, a description, and any tags you want associated with your NFT. You can separate tags with commas or by clicking “enter” after each one.
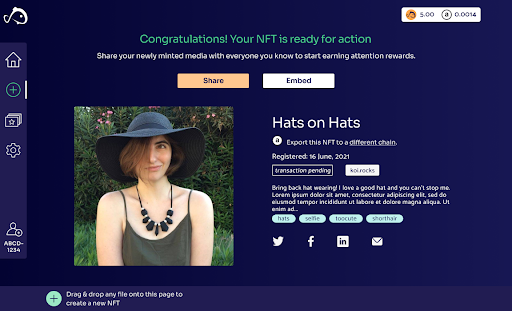
Then click “Create New NFT.”

Now just confirm that all your details are correct, and we’ll be on our way! If you have a referral code from a friend (or enemy, we don’t judge), enter it in the box on the left.
Click “Confirm Registration.” After a few moments, your transaction will appear. Make sure to click the “Share” button to send it to everyone you know. The more people who see it, the more attention rewards (KOII tokens) you will receive!
Better media makes a better world; decentralization lets you own your share of it.
Join the revolution and pre-register to run a node here
To start earning attention rewards on your NFTs, register them now at koi.rocks
Continue the conversation and join Koii’s official community Telegram channel, Koii’s Discord, and follow us on Twitter.
 How to install the Koii Extension in Chrome