At Koii, we are always looking to make our products, and Web3 more generally, better and easier to use. As a part of our continuous commitment to these goals, you can now use Web3.Storage as the storage layer for your Koii tasks. This integration unlocks numerous possibilities for decentralized data storage within the Koii ecosystem.
What is Web3.Storage?
Web3.Storage is a service provided by Protocol Labs that makes it easy for developers to interact with the InterPlanetary File System (IPFS) and Filecoin. By offering a straightforward API, it empowers you to store data in a secure and decentralized manner, enriching your applications with the robustness and accessibility of the distributed web.
A Powerful Synergy
Koii tasks, off-chain computition that are verified and submitted on-chain, provide an innovative framework where creators and consumers interact to create, complete, and earn KOII tokens through various tasks by running desktop node. With the integration of Web3.Storage, we are bolstering this framework by introducing enhanced efficiency and resilience in the way data associated with these tasks is stored and retrieved.
To make sure your Koii tasks work, you’ll need your own Web3.Storage key. We’ll walk you through the process of getting one below.
How to Get Your Web3.Storage Key
To utilize Web3.Storage within Koii tasks, you’ll first need to obtain an API token. Follow these steps:
- Navigate to the Web3.Storage website.
- Click on the Sign In button in the top-right corner.
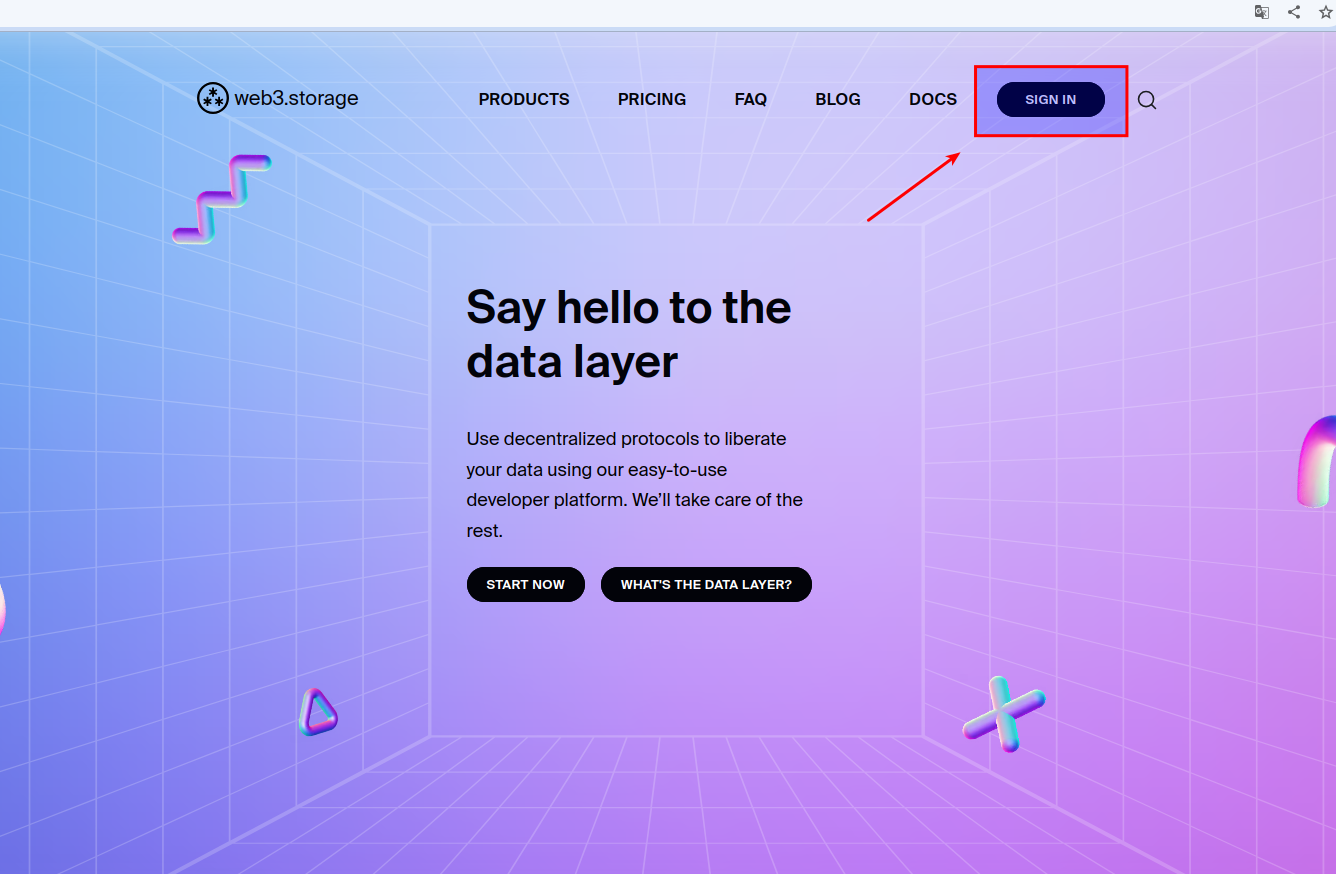
- Select GitHub or Email as your login method, whichever you prefer.
- Follow the prompts to log in.
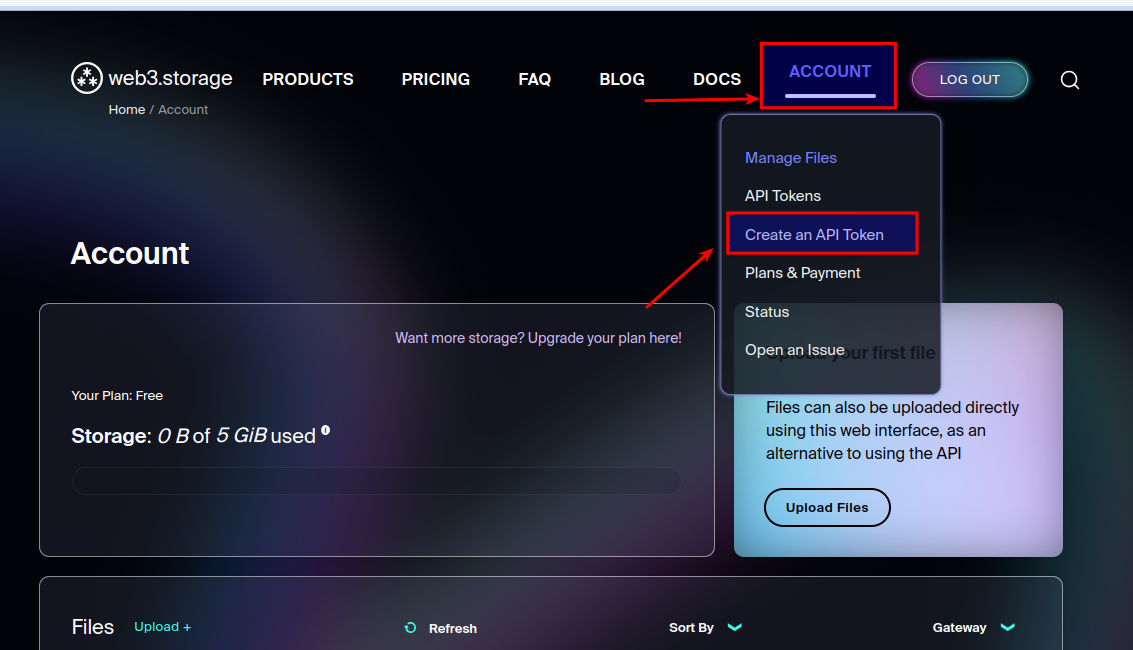
- When you are redirected back to the Web3.Storage site, you’ll see your personal dashboard.
- Hover over Account in the top-right corner but don’t click. Select Create an API Token from the dropdown.
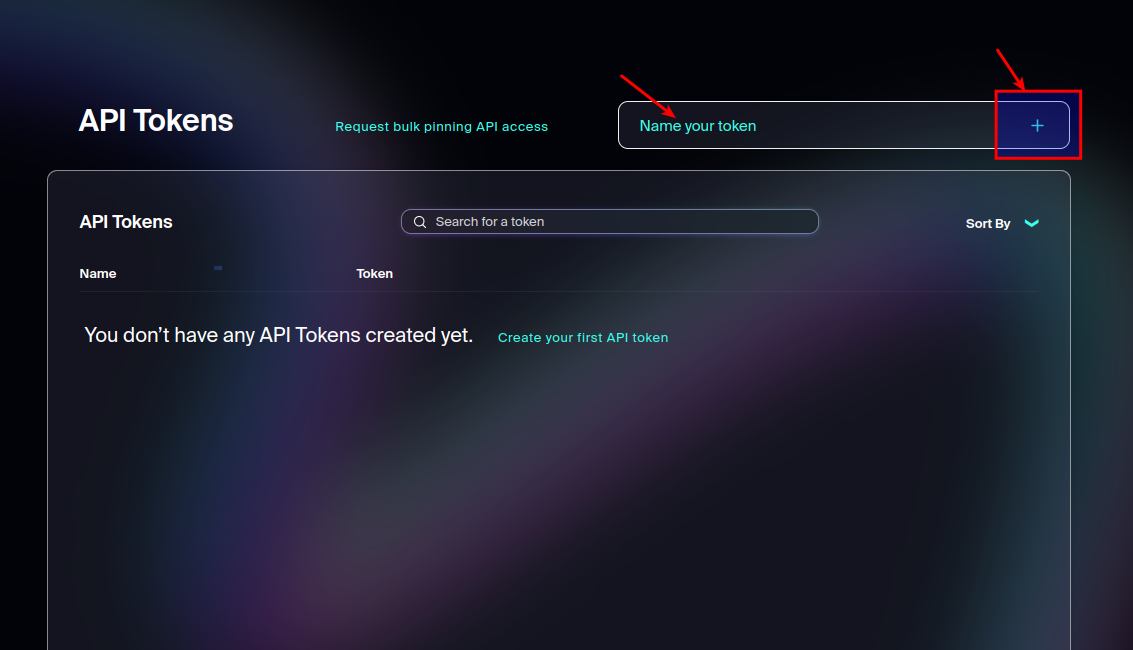
- Enter a name for your key, and click to create a new key. Your new API token will be displayed.
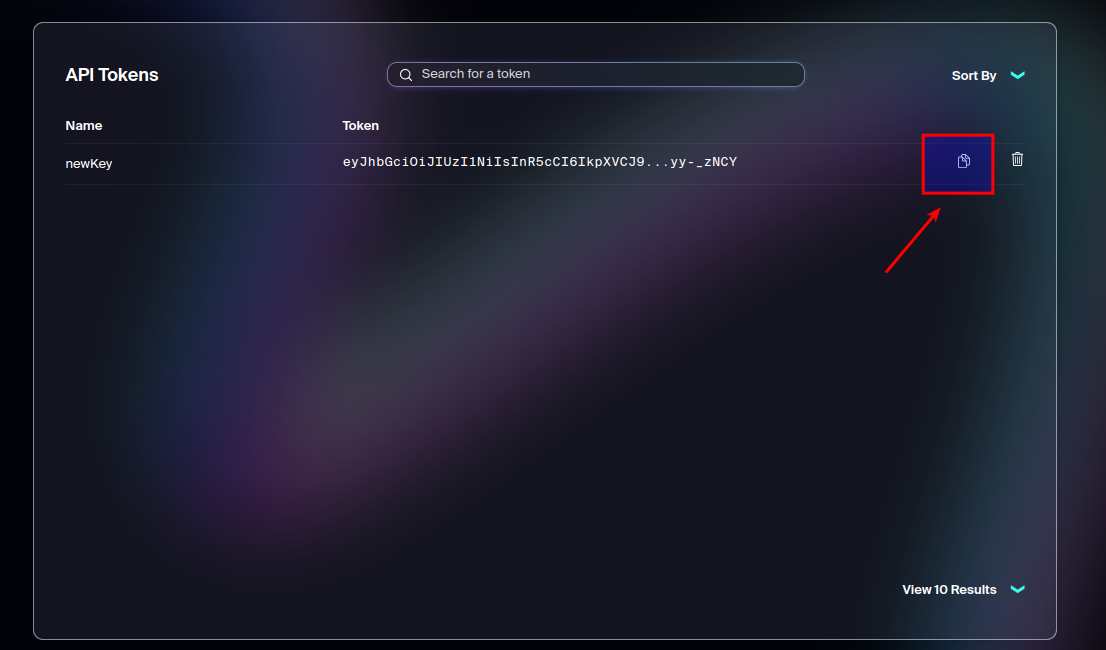
- Find your API token, then click the copy button. Once you’ve copied your API token, you can head back to desktop node.
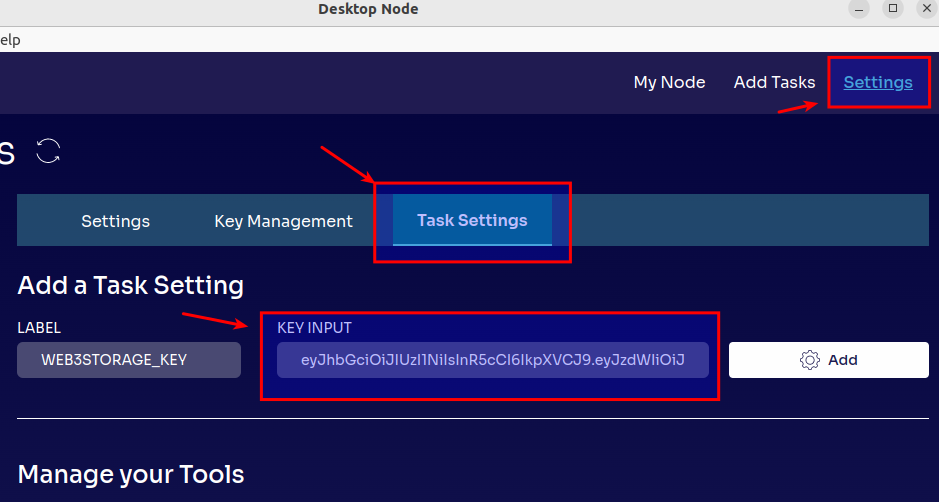
- Once back in the desktop node, go to Settings, then Task Settings. You can name it however you like, we suggest something like “Web3 Storage.” Then paste your API token in “key input” and click “Add.” Now you can use it in your node to run Koii tasks.
Note: Anyone who knows your Web3.Storage key can use it to store data on your behalf. Please keep it safe and secure.
Once you have obtained your Web3.Storage key, you can integrate it into your tasks to enjoy the benefits of decentralized data storage.
Why Use Web3.Storage with Koii Tasks?
Utilizing Web3.Storage with Koii tasks offers multiple benefits:
Decentralized: Your data isn’t stored on a single server, but distributed across multiple nodes, enhancing the reliability and accessibility of your tasks and associated data.
Resilient: Storing your data across different geographical locations makes your data highly resilient to localized failures or disruptions.
Secure: The cryptographic hashes employed by Web3.Storage ensures that your data is safe and secure.
Open and Interoperable: The data stored on Web3.Storage is accessible to any application that interacts with IPFS and Filecoin, offering a great deal of flexibility for future developments.
By integrating Web3.Storage with Koii tasks, we are opening up a world of possibilities for decentralized data storage within the Koii ecosystem. We are confident this will significantly enhance the experience for all our users.
We encourage you to get your Web3.Storage key and start exploring the new possibilities! If you need any help or have questions, feel free to connect with us on Discord. We’re happy to guide you every step of the way.
Start your first node at here🌟
 Calling All Pirates